I encountered a client struggling with an issue regarding thumbnails taking up excessive server disk space: a single image upload resulted in 20+ thumbnails.
The client needed to upload tens of thousands of products, with just the product images consuming 20GB of space. When these were uploaded via a CSV file to a WordPress Woocommerce website, the system automatically created a multitude of thumbnails.
This not only used substantial server space but also necessitated a server with higher specifications. Consequently, the client sought ways to reduce thumbnail generation and conserve disk space.
For WordPress users, automatic thumbnail generation during image uploads can lead to excessive server space usage. This article explores why WordPress produces multiple thumbnails and offers strategies to effectively minimize them, thus saving disk space.
Table of Contents
Why Does WordPress Generate So Many Thumbnails?
WordPress sites generate several thumbnails upon image upload to enhance the user experience. These thumbnails, varying in size and ratio, cater to different contexts such as small images for article lists, medium-sized ones for product pages, and featured images. This ensures optimal image display and quick loading across various devices and layouts. However, this leads to the creation of multiple different-sized thumbnails for each original image, rapidly depleting server space.
The diagram below illustrates that different images are utilized in various sections of a template to optimize the display. Specific images are created for Portfolio, Post, and WooCommerce products. However, this method is somewhat indiscriminate and doesn’t tailor thumbnail generation to specific image types (for example, generating only the necessary thumbnails for WooCommerce products).
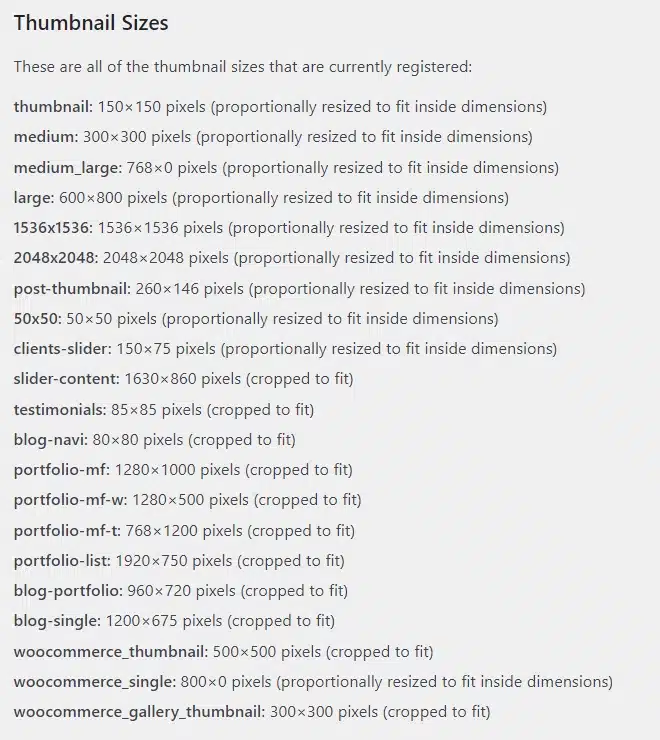
More than 20 thumbnail sizes generated by WordPress
How to Stop WordPress from Generating So Many Thumbnails?
To reduce the number of thumbnails WordPress creates, consider the following methods:
1. Check What Kind of Thumbnails are Generated by Your WordPress Theme.
WordPress’s default thumbnail generation can be viewed in Settings > Media. This, however, does not show all thumbnails (typically only large, medium, and small).
To discover all the thumbnails your WordPress site generates, use free third-party plugins like Regenerate Thumbnails. This plugin allows you to see the variety of thumbnails generated, enabling selective removal of the unnecessary ones.
You can find and install this plugin from the WordPress plugin directory. Once activated, navigate to Tools > Regenerate Thumbnails in the left sidebar to review the thumbnails your WordPress site is producing.
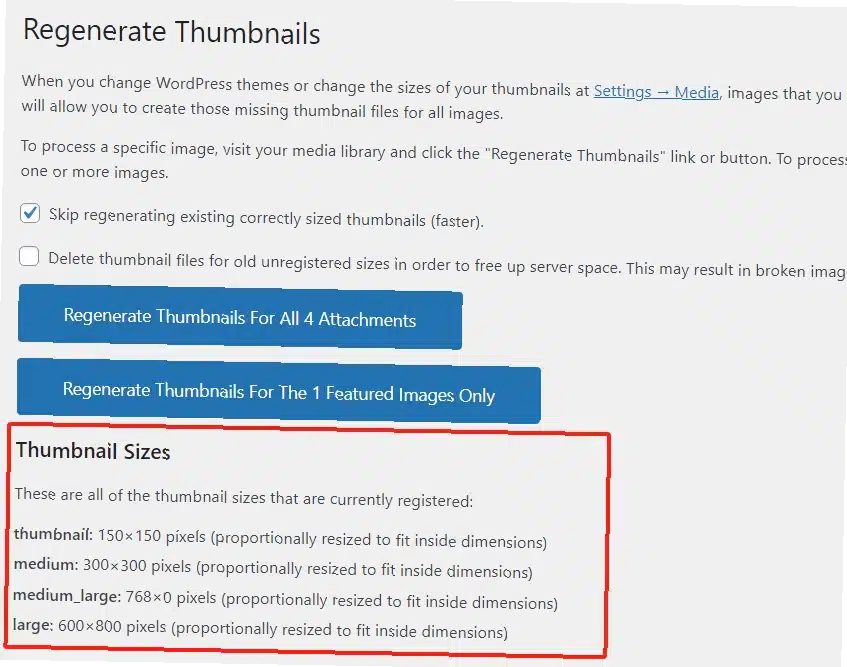
Check thumbnail sizes generated
2. Modify the functions.php File to Prevent Certain Thumbnails.
By editing your WordPress theme’s functions.php file, you can insert code to prevent the generation of specific thumbnail sizes. This requires a basic understanding of PHP, as direct modifications to the site’s code can potentially lead to crashes. Follow these steps to insert the code:
Locate Appearance > Theme File Editor > functions.php in the WordPress backend.
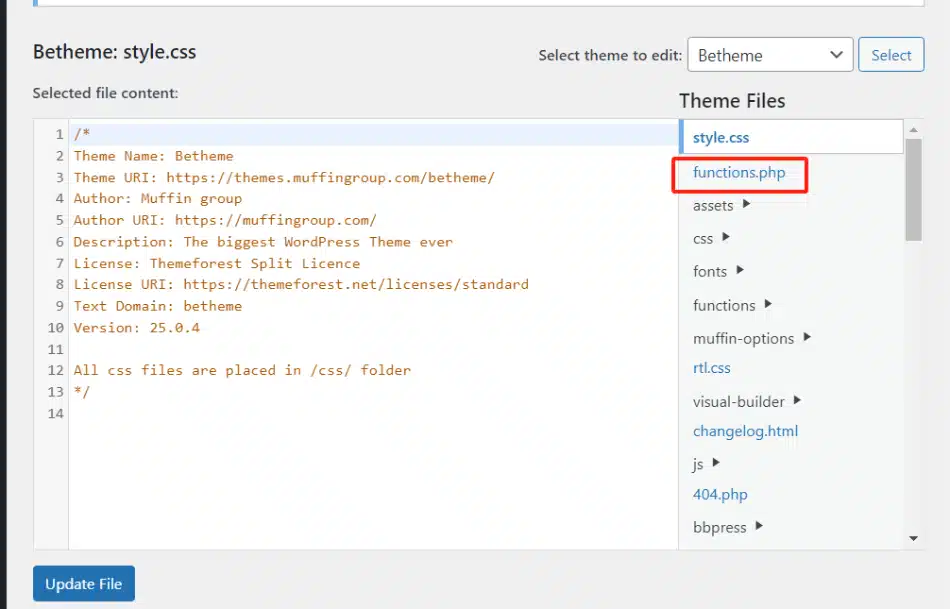
WordPress theme edit functions.php
Insert the following code into this file and save:
function remove_unused_image_sizes() {

// Remove default thumbnail sizes

remove_image_size('thumbnail');

remove_image_size('medium');

remove_image_size('medium_large');

remove_image_size('large');

// Remove WooCommerce sizes, add or delete as needed

remove_image_size('woocommerce_thumbnail');

remove_image_size('woocommerce_single');

remove_image_size('woocommerce_gallery_thumbnail');

// Remove other custom sizes, add or delete as needed

remove_image_size('50x50');

... [list of sizes to remove] ...

remove_image_size('2048x2048');

}

add_action('init', 'remove_unused_image_sizes');
3. Adjust WordPress Image Settings
Set the default thumbnail sizes to zero in WordPress settings. This will prevent WordPress from generating these sizes during image uploads. Access this option by going to Settings > Media in the backend.
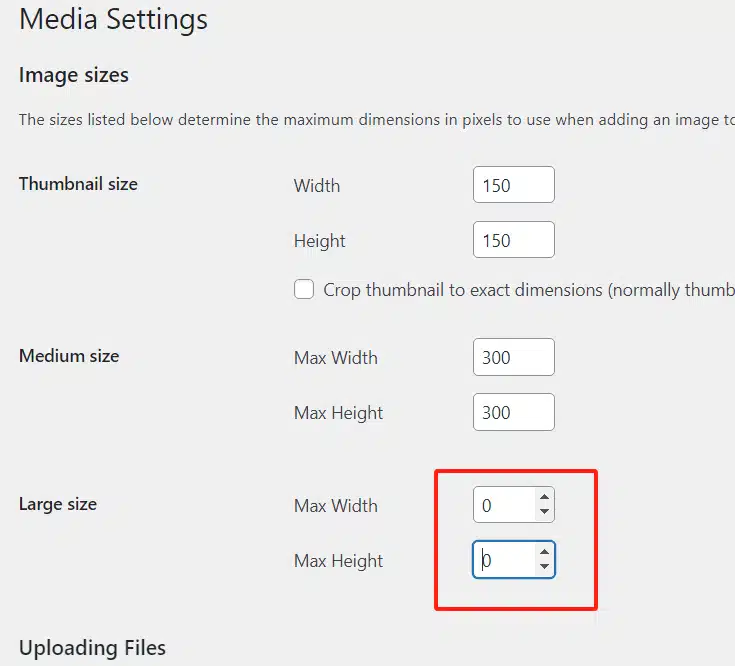
WordPress media setting
These strategies can markedly decrease the number of thumbnails your website generates, potentially halving your disk space usage.


